How to make these personalised labels.
Access to a computer and a printer.
White or cream cotton tape
Iron
Hard surface for ironing on ( I used a tile covered with an old pillowcase )
Transfer paper
Teabag to dye the white tape if desired.
Open a word document on your computer, type in the words you wish to use on your label.
I used size 12, 14 and 16 and you could possibly use 18 depending on the size of your tape.
You will need transfer paper, the one I used is for ink jet printers.
Place one sheet in your printer.
Set the printer page set up on mirror mage, this will print the words on the paper in reverse.
Cut the labels to size
You can use any white or cream 100% cotton tape.
Place the transfer paper onto the tape the correct side facing - you will need to follow the manufacturers instructions for the transfer paper.
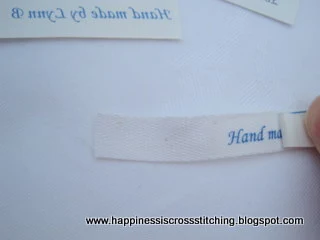
You can see the letters are now facing the correct way
Peel away the transfer paper and you are done!
The top two labels were made by using the white tape dyed in tea. Just pop some of the tape into a bowl with a teabag inside, pour hot water over and leave for 10 minutes. Iron dry the tape and then iron on the words from the transfer paper.
Enjoy!


11 comments
Thank you Lynn! Great tutorial!
oh boy thank you :) I look forward to trying this. What a great touch to handmande ornaments and gifts
I love this tip!
Thank you very much!
Thank you for sharing this...I love that paper and the things you can do in mirror image is amazing.
Be always in stitches.
Great tutorial, Lynn, thanks.
Lynn, Thanks so much for this great tutorial. I've never done this type of transfer before, but need to add to my list to try. ~Ann
Wow, this is a great idea, love it, will have to give it a try.
Thank you.
Thank you very much for the tutorial!
Pat
Great tutorial, thanks for sharing!
Thank You very much, Lynn, it is a great tutorial!
This is fantastic, I can't wait to get the supplies and try it out. Thanks for sharing.
Post a Comment