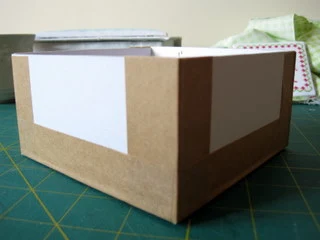
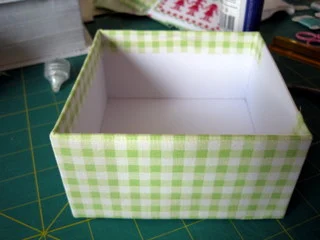
Hi everyone, I have been asked a number of times if I would do a tutorial for my covered boxes, I have finally managed to get around to it. In these instructions I show you how to make the first part, you can see part two here at this post.
My first tip in making a box is to use some cheap material to practice because I have found my box making skills have improved on each box I have made.
Materials required.
Cutting mat to protect your work surfaces
2mm or 3mm thick card from your craft store. (If you live in England you can get it from Hobbycraft)
Fabric glue
Craft knife
Sandpaper to sand the edges of your cardboard.
Ruler
Fine pencil
Gummed paper preferably white to match your cardboard, I used brown but it does show through light fabric.
Choice of fabric - the amount depends on the size of your box, usually between 0.25metres to 0.5 metre of fabric should cover it.
Thread to make the cord trim - I used DMC.
The size of the box is your decision, I will show how to make the box and give you the tips that will apply to all of your box making no matter what the size. I usually make the contents of the box first, I measure around the largest item and base the measurements of the box around that.
Cut the base into a square shape - this one was 12cm x 12cm
Cut 2 sides - these measured 12cm long x 6cm deep
Use the sandpaper to smooth the edges of your cardboard.
Glue the edge of one of the sides and attach to base like this.
The next two pieces are 4mm smaller to fit between the gaps.
How did I arrive at that measurement?
I know my cardboard is 2mm thick so I cut the cardboard 4mm smaller to slot neatly in between the gap.
Put the last piece in to make the box - sorry I forgot to take a photo at that stage.
Now you need to use the gummed paper to secure the box, but please wait for the glue to dry.
The next photo shows the gummed paper I used.
Attach the short strips on each corner first.
And the long strips around each long edge, your box should now look like this.
Cut a strip of fabric long enough to overlap onto three sides, leaving the last side partially covered.
Your box should now look like this. Note the overlap at the top and the bottom of the box, about 1.5 cm.
At the base of the box cut each corner as shown.
Glue the box like this
Fold over the fabric onto the base of the box smoothing down the fabric neatly.
I did smooth this out to be nice and flat but forgot to take the photo.
Turn your attention to the top part of the box now and cut each corner as shown, this allows the corner to be neat when it is folded over. Glue around the inside edge of the box about 1cm from the edge and then fold over the small piece of fabric first followed by the other pieces.
Your box should now look like this!
Part one is now complete, part two can be found here
I hope you find these instructions easy to follow, if anyone has any problems please leave a comment and I will reply as soon as possible.
I hope you will all join in with this box along and send me your photos when complete.
Enjoy!


8 comments
Great!! Thank you :)
I'll wait for next step ;)
Happy Easter
.
__**_**
_**___**
_**___**_________****
_**___**_______**___****
_**__**_______*___**
__**__*______*__**
___**__*____*__**
____**_**__**_**
____**___**__**
___*___________*
__*_____________*
_*____0_____0____*
_*___/___@___\___*
_*___\__/...\__/___*
___*_____W_____*
_____**_____**
_______*****
.
very cute project and you make it so easy with your such understandable tutorial.... love the combination you choose for... very pretty...
Hope you would like to pay a visit to me at
http://craftaworld.blogspot.com/
Love
Farah
I have seen the tutorial of the box.. What a wonderful tutorial..I am exited.. I think this is what I will make of de material I already have.
I became the new follower. And I invite you to look around at my blog..I think You'll like it.
www.alles-vanellis.blogspot.com
succes with your blog.
Hello Lynn B,
Thanks, I very like your blog, I had learn make box from your blog. Thank you very much.
You're a wonderful.
n.Dieu
Hi Lynn, I love your blog. I am new to cross stitching although I am already hooked and can't get enough of it. I am following your instructions but I used masking tape instead of gummed paper as that is all I have at hand. I will send you a pic when I am done. Thank you for your great bog and for giving me loads of inspiration.(",)
Hi there Lynn.
I completed my first box and have blogged about it, crediting you for the tutorial and idea. I hope you like it, you can read about it here http://nasreensthisandthat.blogspot.com/2011/05/dreams-of-diary.html
Warmest regards,
Nasreen
Hi there Lynn.
I completed my first box and have blogged about it, crediting you for the tutorial and idea. I hope you like it, you can read about it here http://nasreensthisandthat.blogspot.com/2011/05/dreams-of-diary.html
Warmest regards,
Nasreen
grazie per aver condiviso questo tuo bellissimo lavoro,molt belli i tuoi lavori verrò a trovarti
Post a Comment