Hi everyone, I thought it was about time I showed you another tutorial, this one is for a mattress pincushion.
You will need ........
Finished cross stitch piece
Lightweight interfacing (Pellon in America)
Sharp scissors
Polyester fibre fill or flat quilt batting
Embroidery thread to match your design
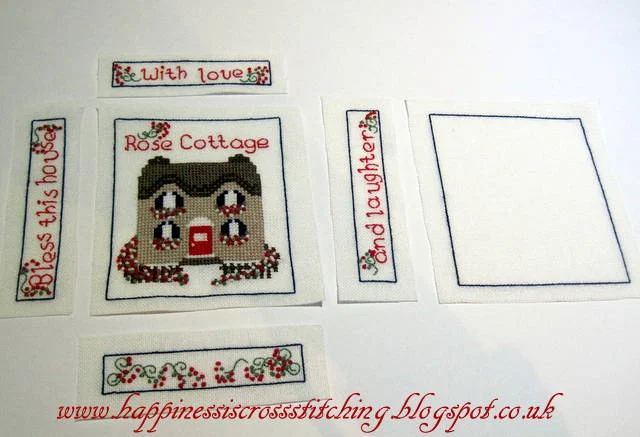
You can make any design into a mattress pincushion as long as you stitch an outline around your pattern and create the panels with the same amount of stitches to line up with other pieces, you will see what I mean when you look at all of the photos.
Iron lightweight interfacing onto the back of each panel piece just within the edging lines.
Cut all panels like this
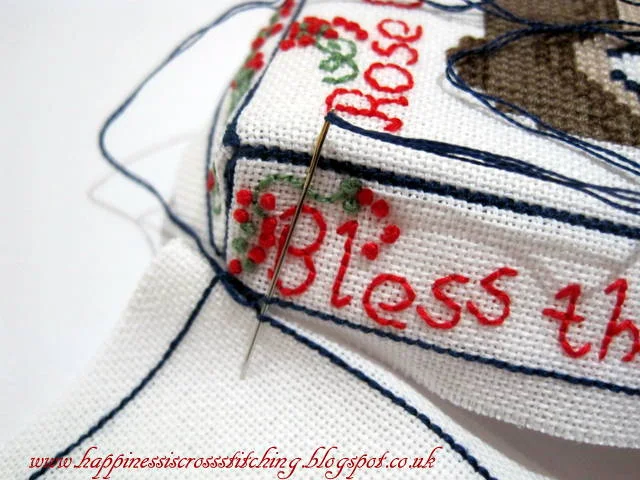
Line up edge so that each backstitch lines up with the backstitch on the other piece
Like this.......
You should have exactly the same amount of back stitches on each side
Attach the next piece at the bottom, see the next picture for a close up!
Can you see? As long as you have exactly the same amount of stitches to match each side then it will be easy!
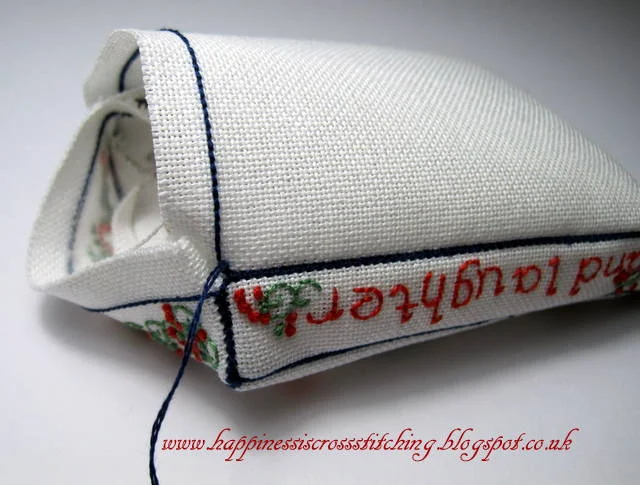
When you have stitched all four sides it should now look like this.
Fold over the corners and stitch them together
There are two ways to fill your mattress, one with fibrefill, which is the way I did it or you can cut pieces of quilt batting the same size as your mattress pincushion and place them inside the mattress before attaching the bottom of the mattress. Using the quilt batting will give a much sharper finish to your mattress.
Attach the bottom piece and stitch all the way around, just before you close the gap fill with fibrefill.
Your mattress pincushion should now look like this.
Please email me or leave me a comment if you are unsure about any of the details and I will do my best to help!
Until next time, happy stitching!


2 comments
Bellísima casita ,me encantan los alfileteros !!!!!!
Besos.
What an ABSOLUTELY WONDERFUL tutorial!!! Now I need to hurry and stitch something so I can try this technique out!!!
Post a Comment